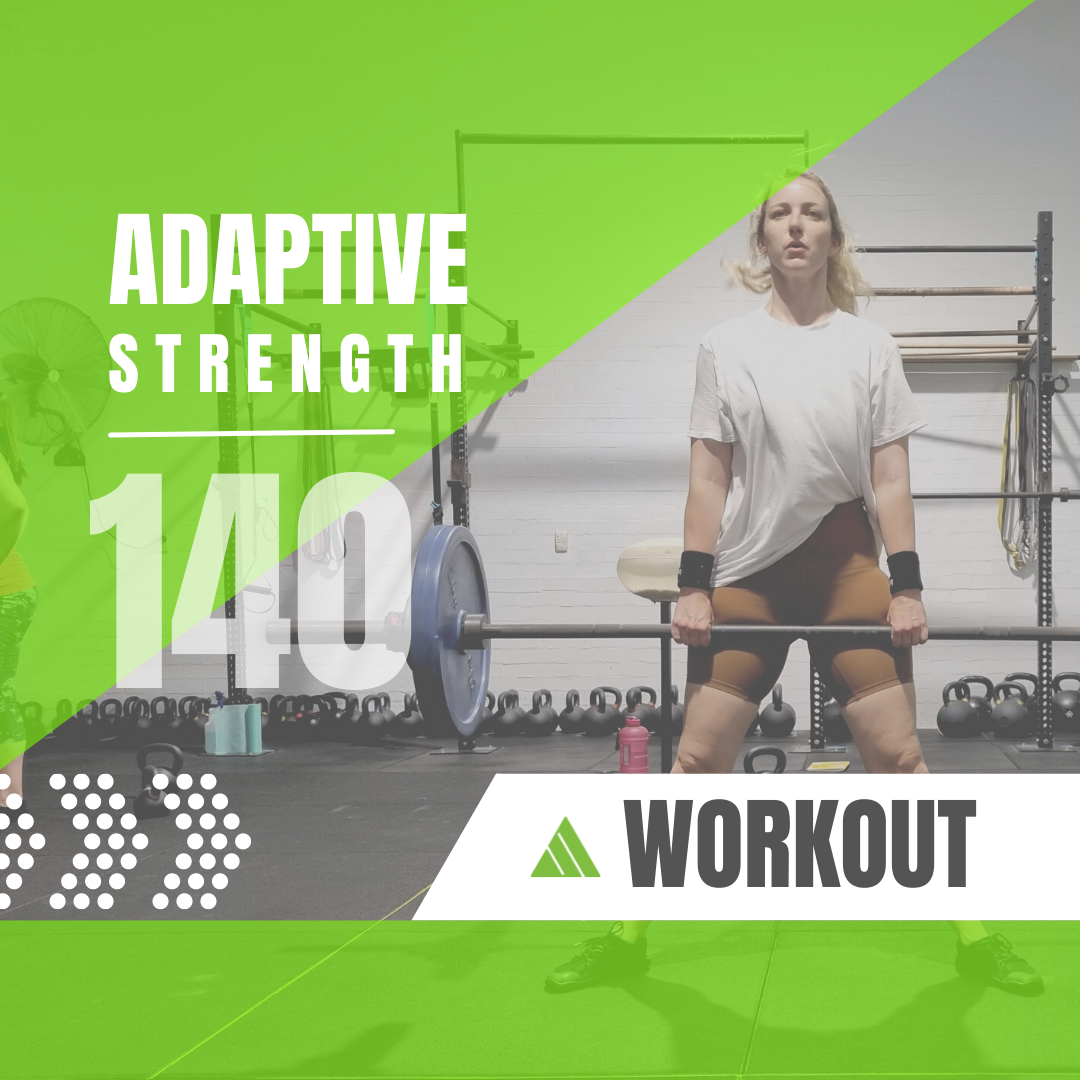
Single-Leg and Upper-Body Strength Workout
A balanced strength workout should challenge both the upper and lower body while giving different movement patterns an opportunity to work together.
This session combines:
- Single-leg hip strength
- Balance and coordination
- Upper-body pulling strength
- Upper-body pushing strength
- Grip strength
- Core and trunk control
- Side-to-side trunk strength
- Cardiovascular conditioning
The exercises include:
- Single-leg deadlifts
- Pull-ups
- Single-arm floor presses
- Side bends
- AirBike conditioning
The first section pairs a single-leg lower-body exercise with an upper-body pull.
The second section combines an upper-body press with a trunk exercise.
The workout finishes with a short AirBike effort to challenge cardiovascular fitness and whole-body work capacity.
Workout Overview
The original workout was designed to be completed in 60 minutes or less.
Part A: Single-Leg Strength and Upper-Body Pulling
Complete five rounds:
- Single-leg deadlift: 5 repetitions on each leg
- Pull-up: 5 repetitions
Rest as needed between exercises and rounds.
Part B: Upper-Body Pressing and Trunk Strength
Complete five rounds:
- Single-arm floor press: 5 repetitions on each side
- Side bend: 10 repetitions on each side
Rest as needed between exercises and rounds.
Part C: AirBike Conditioning
Complete:
- 500 metres on the AirBike
Use a challenging but controlled pace.
The original workout calls this an AirBike sprint, but that does not mean every person should approach the full 500 metres as an all-out effort.
Your pace and distance should reflect your current fitness, experience and ability to recover from the strength sections.
Choose Your Starting Level
You do not need to begin with the complete five-round workout.
Beginner or Returning to Training
Complete:
- 2–3 rounds of Part A
- 2–3 rounds of Part B
- 200–300 metres on the AirBike
Use:
- A supported or bodyweight single-leg deadlift
- An assisted pulling variation instead of unsupported pull-ups
- A light floor-press weight
- A light and controlled side-bend variation
Rest for approximately 60–90 seconds between rounds when needed.
Intermediate
Complete:
- 3–4 rounds of Part A
- 3–4 rounds of Part B
- 300–400 metres on the AirBike
Choose exercises and weights that become challenging without causing significant changes in your technique.
Experienced
Complete the original workout:
- 5 rounds of Part A
- 5 rounds of Part B
- 500 metres on the AirBike
Increase the challenge through appropriate load and movement quality rather than simply trying to finish as quickly as possible.
This Is One Workout, Not a Complete Training Program
This article provides one workout. It is not a complete training program.
A workout tells you what to perform during one training session.
A training program looks at the bigger picture. It determines:
- Which exercises are appropriate for you
- Which physical qualities need the greatest attention
- How frequently you should train
- How your sessions fit together across the week
- How much weight and training volume you should begin with
- How your training fits around sport, work and other activities
- How much recovery you need
- When exercises should be progressed
- When your program needs to be modified
- Whether your training is moving you towards your goals
This workout includes:
- A single-leg hip hinge
- An upper-body pull
- An upper-body press
- Side-to-side trunk strength
- Short conditioning work
A complete program would also consider whether you need:
- Squatting strength
- Bilateral hip and leg strength
- Single-leg knee-dominant exercises
- Overhead strength
- Loaded carries
- Rotational strength
- Power
- Balance
- Longer-duration aerobic training
- Mobility and recovery work
The workout provides today’s session.
Your program determines how this session contributes to your progress over weeks and months.
Who Is This Workout For?
This workout may suit someone who:
- Has some previous strength-training experience
- Wants to improve single-leg strength and balance
- Wants to develop upper-body pushing and pulling strength
- Can perform an appropriate pull-up or assisted pulling variation
- Is comfortable completing floor-based exercises
- Wants to combine strength and conditioning
- Has approximately 40–60 minutes available
The workout can be adjusted for someone with less experience, but the single-leg deadlift and pull-up both require an appropriate starting variation.
Someone who has not developed enough balance for an unsupported single-leg deadlift may begin with support or use a kickstand deadlift.
Someone who cannot yet complete five controlled pull-ups should not be expected to force five repetitions. An assisted pull-up, lat pulldown or TRX row may be more appropriate.
A person currently managing hip, knee, back, shoulder or elbow pain may require different exercises, ranges of movement or training volumes.
Equipment You Will Need
Depending on the exercise variations used, you may need:
- One or two kettlebells or dumbbells
- A pull-up bar
- Pull-up assistance bands or an assisted pull-up machine
- An exercise mat
- An AirBike
- A timer
The single-leg deadlift can be performed:
- Without weight
- With one weight in one hand
- With one weight in each hand
- With a weight held in front of the body
The best version depends on your balance, strength and experience.
You may also require different weights for the single-leg deadlift, floor press and side bend.
Part A: Single-Leg Deadlifts and Pull-Ups
Complete up to five rounds:
A1. Single-Leg Deadlift
Complete five repetitions on each leg.
A2. Pull-Up
Complete five repetitions or use an appropriate pulling variation.
The two exercises challenge different areas of the body.
The single-leg deadlift develops lower-body and trunk control, while the pull-up develops upper-body pulling strength.
Pairing them allows the upper body to receive some recovery during the deadlift and the legs to receive some recovery during the pull-up.
Exercise 1: Single-Leg Deadlift
The single-leg deadlift is a hip-hinge exercise performed while one leg provides most of the support.
As your hips move backwards, the other leg extends behind you to help balance the movement.
You then use the hip and leg of the standing side to return to an upright position.
The exercise can be performed with no external weight or with a kettlebell or dumbbell.
What Does the Single-Leg Deadlift Develop?
Single-leg deadlifts can help develop:
- Glute strength
- Hamstring strength
- Hip stability
- Single-leg balance
- Foot and ankle control
- Hip-hinge technique
- Core and trunk stability
- Coordination between the upper and lower body
- Awareness of differences between sides
Unlike a standard two-leg deadlift, the single-leg variation provides a smaller base of support.
Your standing leg must produce force while your foot, ankle, hip and trunk work to keep you balanced.
The exercise can also challenge the body to resist unwanted rotation.
Daily-Life Carryover
Single-leg control is used throughout everyday movement.
We briefly support ourselves on one leg during every step we take.
The qualities developed through a single-leg deadlift may support activities such as:
- Walking
- Climbing stairs
- Stepping over an obstacle
- Reaching towards the floor
- Picking up a light object while balancing
- Gardening
- Moving over uneven ground
- Regaining your balance after an awkward step
- Putting on shoes or clothing while standing
The gym exercise is more deliberate than most of these activities, but it develops strength and control through a similar single-leg position.
Sporting Carryover
Single-leg strength and hip control are important in many sports because running and changing direction repeatedly place the body onto one leg.
These qualities may support:
- Running
- Accelerating
- Decelerating
- Jumping
- Landing
- Changing direction
- Tennis and other court sports
- Field sports
- Golf
- Hiking
- Skiing
The single-leg deadlift does not reproduce these sporting actions exactly.
It helps develop some of the hip strength, balance and trunk control that may support them.
Single-Leg Deadlift Coaching Tips
Focus on:
- Beginning from a balanced standing position
- Keeping the standing foot firmly connected to the floor
- Maintaining a slight bend in the standing knee
- Pushing your hips backwards
- Allowing the free leg to extend behind you
- Keeping your hips reasonably level
- Maintaining a controlled trunk position
- Using a range you can manage
- Driving through the standing foot to return upright
- Finishing tall without leaning backwards
The goal is not to reach the weight as close to the floor as possible.
The useful range is the range you can control without losing your hip, knee, foot or trunk position.
Should the Weight Be Held on the Same or Opposite Side?
The original workout does not specify how the single-leg deadlift should be loaded.
Different loading positions can create different challenges.
Holding the weight in the hand opposite the standing leg may create a greater rotational demand.
Holding the weight on the same side may change the balance and hip-stability challenge.
Holding two weights may provide a more even loading position.
There is not one version that is automatically right for everyone. Use the variation prescribed within your program or the one you can perform with the best control.
Single-Leg Deadlift Modifications
Possible alternatives include:
- Bodyweight single-leg deadlifts
- Holding onto a stable support
- Using a wall or dowel for balance
- Kickstand deadlifts
- Split-stance Romanian deadlifts
- Two-leg kettlebell deadlifts
- Romanian deadlifts
- Deadlifting from an elevated surface
- Reducing the range of movement
A kickstand deadlift allows the back foot to remain lightly on the floor, creating more support while keeping much of the emphasis on the front leg.
Exercise 2: Pull-Up
The pull-up develops upper-body pulling strength by moving your body towards a fixed bar.
The standard pull-up normally begins from a hanging position with the palms facing away from the body.
The workout prescribes five repetitions, but five unsupported pull-ups will not be appropriate for everyone.
The correct pulling variation should allow you to use a controlled range without swinging, kicking or excessively changing your body position.
What Do Pull-Ups Develop?
Pull-ups can help develop:
- Lat strength
- Upper-back strength
- Arm strength
- Grip strength
- Shoulder-blade control
- Shoulder stability
- Trunk control
- Confidence supporting and moving your body weight
Pull-ups require several areas of the upper body to work together.
Your hands maintain the grip, your upper back and arms create the pulling force, and your trunk helps keep the movement organised.
Daily-Life Carryover
Most daily activities do not require a full pull-up.
However, the strength developed through pull-ups or their variations may support tasks such as:
- Pulling an object towards you
- Climbing
- Holding onto a rail or support
- Moving equipment
- Pulling open a heavy door
- Handling luggage
- Supporting part of your body weight through your hands
- Controlling an object that is pulling away from you
Grip and upper-back strength can also be useful when carrying or handling objects for longer periods.
Sporting Carryover
Upper-body pulling and grip strength may support activities involving:
- Swimming
- Rowing
- Paddling
- Climbing
- Racquet sports
- Gymnastics
- Grappling
- Contact sports
- Obstacle-course events
The pull-up does not directly reproduce each of these sporting actions.
It develops general pulling and grip strength that may contribute to them.
Pull-Up Coaching Tips
Focus on:
- Establishing a secure grip
- Beginning from a controlled hanging or starting position
- Keeping your shoulders active rather than collapsing passively
- Initiating the movement through the upper back
- Pulling without excessive kicking or swinging
- Maintaining control through your trunk
- Using a range you can manage
- Lowering under control
- Ending the set before your technique significantly changes
Not every person needs to move their chin above the bar immediately.
The range should reflect the pulling variation and the person’s current capacity.
Pull-Up Modifications
Possible alternatives include:
- Assisted pull-ups
- Band-assisted pull-ups
- Assisted pull-up machine
- Eccentric or lowering pull-ups
- Isometric pull-up holds
- Lat pulldowns
- TRX rows
- Inverted rows
- Cable rows
- Resistance-band pulldowns
A row is not identical to a pull-up, but it can provide an appropriate upper-body pulling exercise for someone who is not ready to hang or pull vertically.
Part B: Floor Presses and Side Bends
Complete up to five rounds:
B1. Single-Arm Floor Press
Complete five repetitions on each side.
B2. Side Bend
Complete 10 repetitions on each side.
The floor press develops upper-body pushing strength.
The side bend develops strength and control through the sides of the trunk.
Exercise 3: Single-Arm Floor Press
The floor press is performed lying on the floor while pressing a kettlebell or dumbbell above the chest.
Because the original workout lists five repetitions on each side, it is best interpreted as a single-arm floor press.
One side works at a time while the trunk helps prevent unwanted rotation.
What Does the Single-Arm Floor Press Develop?
Single-arm floor presses can help develop:
- Chest strength
- Triceps strength
- Shoulder strength
- Upper-body pressing strength
- Shoulder control
- Core and trunk stability
- Control under an uneven load
- Awareness of strength differences between sides
The floor limits how far the upper arm can travel behind the body.
This can make the exercise more manageable than some bench-press variations, although the correct exercise still depends on the individual.
Because only one arm is loaded, your trunk must work to keep your body from rolling or rotating towards the weight.
Daily-Life Carryover
Pushing strength is useful when:
- Opening a heavy door
- Moving furniture
- Pushing a trolley
- Getting up from the floor
- Moving equipment
- Supporting yourself through your arms
- Completing household or manual tasks
- Controlling an object away from your body
The single-arm position also develops control when the load is not evenly distributed between both sides.
Sporting Carryover
Upper-body pushing strength may support activities involving:
- Throwing
- Racquet sports
- Contact sports
- Swimming
- Bracing
- Pushing against another player
- Gymnastics
- Ground-based sporting positions
The floor press develops general pushing strength and control.
Sporting technique must still be developed through practising the sport itself.
Single-Arm Floor-Press Coaching Tips
Focus on:
- Positioning the weight safely before lying down
- Keeping your feet and lower body stable
- Maintaining control through your ribs and pelvis
- Keeping your wrist positioned over your forearm
- Lowering the weight under control
- Allowing the upper arm to touch the floor gently
- Pressing the weight into a stable position
- Avoiding excessive trunk rotation
- Using a controlled range
- Returning the weight safely after the final repetition
Do not allow the weight to fall quickly towards the floor.
The lowering portion is an important part of the exercise.
Floor-Press Modifications
Possible alternatives include:
- Using a lighter weight
- Pressing with both arms
- Dumbbell floor presses
- Kettlebell floor presses
- Cable presses
- Incline push-ups
- Wall push-ups
- Machine chest presses
- A reduced pressing range
Exercise 4: Side Bend
Complete 10 repetitions on each side.
The original workout does not specify the exact side-bend variation.
A common version involves holding a kettlebell or dumbbell in one hand, moving through a controlled sideways range and then returning to an upright position.
Follow the version demonstrated by your coach.
What Do Side Bends Develop?
Controlled side bends can help develop:
- Strength along the sides of the trunk
- Lateral trunk control
- Grip strength
- Control under an uneven load
- Awareness of side-to-side movement
- The ability to return to an upright position
The muscles along the sides of the trunk can perform two related but different roles.
They can produce sideways movement, as in a side bend.
They can also resist being pulled sideways, as in a suitcase carry.
This workout uses the movement-producing version.
Daily-Life Carryover
Side-to-side trunk strength and control may be useful when:
- Reaching towards one side
- Picking up an object beside you
- Handling an uneven load
- Carrying something in one hand
- Moving through an awkward household or work position
- Recovering your balance after being pulled sideways
- Gardening
- Reaching into a vehicle
The goal is not to create the largest possible sideways movement.
The goal is to move through a controlled range and return to upright using the muscles around the trunk.
Sporting Carryover
Lateral trunk strength and control may support:
- Running
- Changing direction
- Throwing
- Tennis and other racquet sports
- Swimming
- Climbing
- Contact sports
- Golf
- Field and court sports
Sport often places force through the body from different directions.
Developing control through the sides of the trunk may help the body manage some of those forces.
Side-Bend Coaching Tips
Focus on:
- Beginning from a tall position
- Keeping both feet firmly planted
- Holding the weight securely
- Moving through a comfortable sideways range
- Avoiding excessive forward or backward twisting
- Keeping the weight close to your body
- Returning to upright under control
- Using a weight that does not pull you off balance
- Completing a similar controlled range on both sides
The exercise should not be performed by bouncing or dropping quickly towards the weight.
Side-Bend Modifications
Possible alternatives include:
- Using a lighter weight
- Using a smaller range
- Performing the movement without weight
- Suitcase holds
- Suitcase carries
- Side planks
- Pallof presses
- Offset carries
A suitcase hold or carry may be more appropriate when the goal is to resist sideways movement rather than produce it.
Part C: 500-Metre AirBike Finish
Finish the session with up to 500 metres on the AirBike.
The AirBike uses both the arms and legs. Pushing and pulling the handles while pedalling allows the whole body to contribute to the effort.
The original workout describes the 500 metres as AirBike sprints.
For an experienced person, this may be completed as one strong continuous effort.
For someone with less conditioning experience, it may be more appropriate to use a controlled pace or divide the distance into shorter intervals.
What Does the AirBike Develop?
AirBike training can help develop:
- Cardiovascular fitness
- Whole-body conditioning
- Leg endurance
- Upper-body pushing and pulling endurance
- Coordination between the arms and legs
- The ability to produce repeated effort
- General work capacity
The AirBike is low impact because it does not involve running or repeated landing.
However, a hard AirBike effort can still be physically demanding because both the upper and lower body are working.
Why Finish with the AirBike?
The strength sections use relatively low repetitions with rest between exercises and rounds.
The AirBike adds a continuous conditioning challenge.
Finishing with the AirBike allows the strength exercises to be completed before breathing rate and whole-body fatigue become excessively high.
This can make it easier to maintain good single-leg deadlift, pull-up and pressing technique.
Suggested AirBike Options
Beginner or Returning to Training
Complete:
- 200–300 metres at a controlled pace
Alternatively, divide the distance into shorter sections with rest.
Intermediate
Complete:
- 300–400 metres at a strong but sustainable pace
Experienced
Complete:
- The original 500 metres
Use a pace that is hard but still allows you to maintain an organised pushing, pulling and pedalling rhythm.
AirBike Coaching Tips
Focus on:
- Adjusting the seat to an appropriate height
- Keeping your feet secure on the pedals
- Using both the arms and legs
- Maintaining a consistent rhythm
- Avoiding an unnecessarily aggressive first few seconds
- Keeping your trunk controlled
- Breathing throughout the effort
- Reducing the pace if your movement becomes disorganised
An all-out start can cause your pace to fall sharply before the distance is complete.
A controlled beginning may produce a stronger overall effort.
Why Do These Exercises Work Well Together?
The workout provides a balance between upper-body pulling and pushing.
The pull-up develops pulling strength.
The floor press develops pushing strength.
The single-leg deadlift adds hip strength, balance and single-leg control.
The side bend develops strength through the sides of the trunk.
The AirBike finishes the session with whole-body conditioning.
Together, the exercises challenge:
- Hip and hamstring strength
- Single-leg balance
- Upper-body pulling strength
- Upper-body pushing strength
- Grip
- Trunk stability
- Lateral trunk strength
- Cardiovascular fitness
The workout also pairs exercises that do not compete heavily for the same muscles.
The single-leg deadlift is paired with a pull-up, while the floor press is paired with a side bend.
This allows one area to receive some recovery while another area works.
However, this is still only one training session.
The workout does not include a significant:
- Squat
- Single-leg knee-dominant movement
- Overhead press
- Loaded carry
- Rotational exercise
- Longer-duration aerobic effort
Those physical qualities may be trained elsewhere within a complete program.
How Hard Should the Workout Feel?
The strength exercises should feel challenging without forcing you to lose control.
You may notice:
- Fatigue through the hips and hamstrings
- Increased balance demand during the single-leg deadlift
- Grip and upper-back fatigue during pull-ups
- Chest and arm fatigue during floor presses
- Trunk fatigue during side bends
- A significant increase in breathing rate during the AirBike
Reduce the weight, repetitions or number of rounds if:
- You repeatedly lose balance during the single-leg deadlift
- Your hips rotate significantly
- You cannot control the deadlift range
- Your pull-ups become dominated by swinging or kicking
- You cannot control the lowering portion of the pull-up
- Your trunk rotates excessively during the floor press
- You lose control during the side bend
- Your technique deteriorates significantly between rounds
- You experience pain rather than normal muscular effort
Completing three controlled rounds is generally more useful than forcing yourself through five rounds with poor movement quality.
How Can You Progress the Workout?
Progress one variable at a time.
You could:
- Increase from two rounds to three
- Build from three rounds towards five
- Add a small amount of weight to the single-leg deadlift
- Reduce the amount of balance support
- Improve your single-leg deadlift range
- Use less pull-up assistance
- Add a controlled pull-up repetition
- Increase the floor-press weight
- Improve trunk control during the floor press
- Increase the side-bend weight slightly
- Increase the AirBike distance
- Complete the same AirBike distance at a more consistent pace
You do not need to progress every exercise during the same session.
Your floor press may improve faster than your pull-up. Your single-leg deadlift balance may improve before you are ready to add more weight.
Progress should be based on the quality of your previous training rather than simply your ability to complete the workout.
How Adaptive Strength Builds an Individualised Training Program
At Adaptive Strength, we do not simply give every member the same workout of the day.
Each member follows an individualised strength-training program based on their:
- Goals
- Current strength and fitness
- Training experience
- Injury and medical history
- Movement ability
- Weekly availability
- Sporting and recreational activities
- Response to previous training
Your sessions form part of a planned program rather than a collection of unrelated workouts.
A complete program considers:
- Which exercises are most appropriate for you
- Which physical qualities need the greatest attention
- How your training sessions fit together across the week
- How much training you can currently tolerate and recover from
- How your strength work fits around sport, work and other activities
- When an exercise, weight or training volume should be progressed
- When your program needs to be modified
Two members may train beside each other while following completely different programs because they have different goals, starting points and training histories.
One member may perform a supported bodyweight single-leg deadlift and TRX rows. Another may use a heavier loaded single-leg deadlift and complete unassisted pull-ups.
One may use a light two-arm floor press, while another completes a heavier single-arm variation.
Both can receive an appropriate challenge within the same supervised small-group environment.
Our coaches supervise each session, monitor how you are moving and make adjustments when required. Your program can then gradually progress as your strength, confidence and physical capacity improve.
The value is not simply being given a list of exercises.
It is having a program designed for you, coached properly and progressed over time.
Should You Try This Workout?
This workout may be useful if you can select an appropriate single-leg deadlift, upper-body pulling exercise, floor press and conditioning level.
However, one online workout cannot assess your balance, technique, injury history, current capacity or how the session should fit into the rest of your training week.
That is the difference between completing a workout and following an individualised training program.
Looking for a More Personalised Approach?
Adaptive Strength provides individualised strength programs within a supportive, supervised small-group training environment in Booragoon.
Your program is built around your:
- Current ability
- Training experience
- Goals
- Injury history
- Exercise preferences
- Weekly schedule
Our strength coaches, physiotherapists and Exercise Physiologist work together to help members progress from their current starting point towards greater strength, confidence and long-term physical capacity.
Whether you are returning after an injury, getting back into exercise or looking for a more structured approach to training, the first step is an initial consultation and movement assessment.
Book a quick chat with Adaptive Strength to find out whether our approach is right for you.